What It Feels Like When the Shift Won’t Engage
Outboard shifting has gotten complicated with all the conflicting advice flying around. But the actual diagnosis? It starts with one observation you can make in about three seconds flat.
Does the shift lever move — or is it jammed solid?
If the lever travels freely but the motor sits stubbornly in neutral no matter what you do, you’re dealing with a cable, linkage, or internal clutch issue. If the lever won’t budge at all — stiff, locked, completely immovable — mechanical resistance somewhere in the cable or linkage chain is almost certainly your problem. That one distinction keeps you from chasing ghosts for two hours.
Start Here — Check the Shift Cable First
As someone who has made every possible mistake on outboard motors, I learned everything there is to know about misdiagnosing shift problems. On a 2003 Yamaha 90 hp — my uncle’s boat, not even mine — I convinced myself the gearcase was toast. Pure assumption. Turned out the shift cable was kinked inside the rubber boot and corroded half-black. Forty dollars and thirty minutes later, it shifted like new. Probably should have opened with this section, honestly.
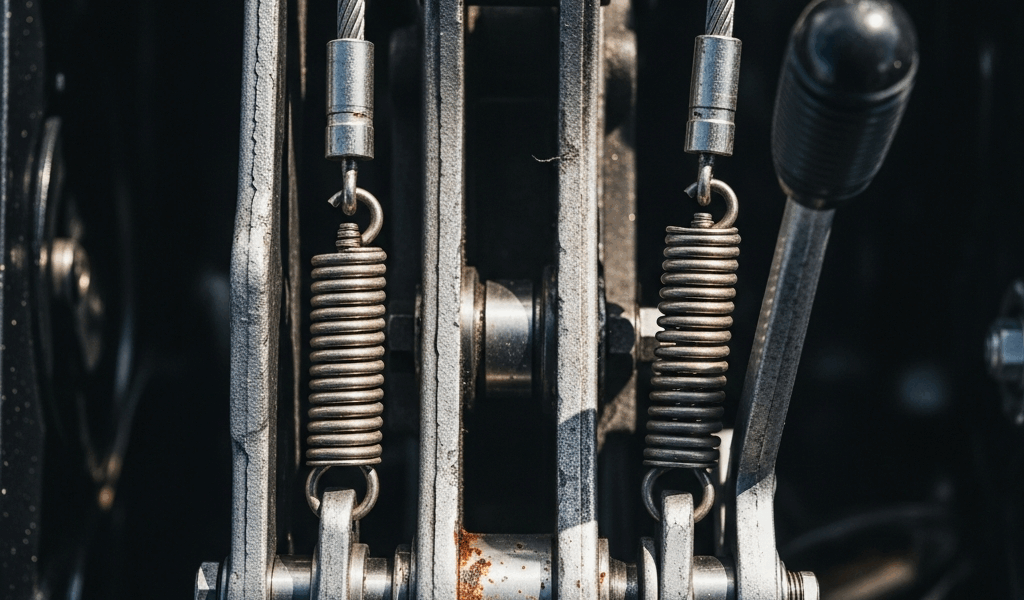
The shift cable runs from your control box down through the engine cover to the shift cam on the lower unit. Salt spray, heat cycles, freshwater intrusion, constant vibration — it takes a beating. On motors past the five-year mark especially, cables stretch, kink, and develop internal corrosion that creates drag you can actually feel.
Visual Inspection
Pop the engine cover and look at the shift cable sheath. Run your hand along the full length of it. You’re looking for:
- Visible kinks or sharp bends that flatten the cable housing
- Black or green corrosion on the metal end fittings
- Fraying or splitting of the cable sheath itself
- Any disconnection at the shift cam end or control lever end
Cable looks clean and straight? Move to the functional test.
Test Cable Tension and Movement
Motor off. Move the shift lever through its full range — forward, neutral, reverse. A healthy cable moves smoothly with moderate resistance. No grinding, no sudden stickiness, no dead zones where the lever travels but nothing happens below.
Now grab the cable sheath near the shift cam and wiggle it gently. Slides freely inside? Normal. Feels gritty, stiff, like you’re pushing through paste? Internal corrosion. That’s your culprit.
A corroded cable almost always needs replacing — there’s no real fix for internal rust. Most aftermarket shift cables for Yamaha, Mercury, Suzuki, and Honda run between $35 and $120 depending on length and motor size. Installation is genuinely straightforward: loosen the end fitting at the shift cam, slide the old cable out, feed the new one through the same path, secure both ends. Basic wrench set, maybe 30 minutes.
One detail worth knowing before you start. When you pull the old cable, measure it or count how many coils of sheath are exposed at each end. New cables sometimes come slightly longer than OEM spec, and a cable that’s too long causes shift delay. You’ll need to trim and re-crimp the end if it’s oversized. Don’t make my mistake of assuming the new one matches exactly.
Shift Linkage and Throttle Linkage Misalignment
Cable moves smoothly. Lever feels right. Gears still won’t catch. The problem might be sitting between the cable and the gearcase itself — the linkage system.
But what is the shift cam linkage? In essence, it’s the mechanical connection between your cable and the gearcase rotation. But it’s much more than that. Modern outboards run both a shift linkage and a throttle linkage through a single shift cam, and those two systems have to stay synchronized. When they drift out of alignment — after repeated tilting and trimming, or after the motor’s been pulled for service — the cam won’t rotate far enough to fully engage the forward or reverse dogs.
What to Look For at the Shift Cam
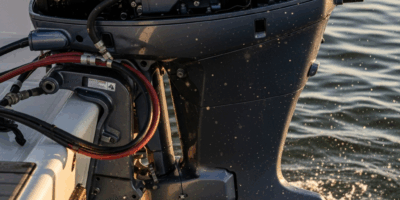
The shift cam is a rotating mechanism bolted to the lower unit gearcase. Usually visible without major disassembly. You can see the cable end fitting attached to an arm on the cam.
Motor off, shift lever in neutral — look at where the cam sits. Then move the lever to forward. The cam arm should rotate smoothly to a definite stop. Repeat with reverse. Both positions should feel equally firm with the same range of motion on each side.
Soft or spongy feel in one direction? Cam not rotating the full distance it should? The linkage arm may have bent, or the cable attachment point may have sheared. A bent arm can sometimes be carefully straightened. A sheared fitting means ordering a replacement arm assembly — typically $80 to $200 depending on the brand.
Neutral Safety Switch Interference
Most modern outboards have a neutral safety switch that kills spark if the engine tries to start in gear. Occasionally this switch sticks or binds, and it prevents full shift engagement as a kind of accidental safety measure. Test it simply: does the motor actually start when you’re in neutral? If it cranks fine but won’t shift into gear with the motor running, the safety switch might be the hidden culprit — at least if everything else checks out. A marine tech can test it with a multimeter in about two minutes.
Clutch Dog Wear — When the Problem Is Inside the Gearcase
Cable is clean. Linkage is aligned and rotating properly. Shift lever hits its stops at both ends. Gears still won’t lock in, or you hear grinding when you try to shift.
That’s when the problem moves from outside to inside.
The clutch dog is a small, spring-loaded mechanism inside the gearcase that physically connects the drive shaft to the forward or reverse gear. Worn or chipped clutch dogs can no longer grip those gears tightly enough to hold them. Clutch dog failure typically sounds like grinding metal on shift attempts, or feels like the gears are catching intermittently and then slipping back to neutral under load. Some motors behave like they’re stuck in neutral even when you’ve pushed the lever all the way forward or reverse.
Why This Isn’t a DIY Fix
I’ve opened a gearcase once. That was 2019. It required:
- Removing the entire lower unit from the motor
- Draining and properly disposing of 2 quarts of gear oil
- Unbolting and separating the gearcase halves
- Identifying which clutch dog is worn — there are multiple
- Sourcing a replacement dog ($20 to $60) plus shims, seals, and gaskets
- Reassembling without cross-threading bolts or trapping gasket material
- Refilling with the correct gear oil and torque-testing the case bolts to spec
A competent marine mechanic takes 2 to 4 hours on this job, plus parts. Labor alone runs $300 to $600. For anyone without prior gearcase experience, the risk of damaging internal precision surfaces or seals is genuinely real. One slip with a bolt wrench can add another $500 in parts damage to your bill.
Here’s the cardinal rule: if forcing the shift lever produces grinding sounds, stop immediately. Forcing a stuck shift with worn dogs accelerates damage fast — turns a $400 repair into a $1,200 gearcase replacement. That’s what makes this particular mistake so endearing to mechanics who charge by the hour.
When to Stop DIYing and Call a Marine Mechanic
So, without further ado, let’s talk about the stop sign.
You’ve worked through the full sequence. Cable is good. Linkage is aligned. Shift lever moves with normal resistance. Gears still won’t engage, or you’re hearing grinding. That’s your signal. Stop troubleshooting. Don’t try to force it one more time.
Call a marine mechanic or authorized dealer for your motor’s brand. When you do, tell them exactly what you’ve already tested:
- “I’ve verified the shift cable moves smoothly with no internal corrosion.”
- “The shift linkage rotates fully in both forward and reverse.”
- “The problem is that the gears won’t lock in, even though the lever reaches its stops.”
- “When I try to force it, I hear grinding metal sounds.”
That level of specificity compresses their diagnosis time — and saves you $50 to $100 in shop labor. The mechanic skips re-checking cable work you’ve already confirmed. They go straight to what you haven’t touched yet.
While you won’t need a full machine shop to solve most shift problems, you will need a handful of basic tools and a willingness to stop before you make things worse. Most shift failures are fixable at home in under an hour. The rest require professional equipment and a controlled shop environment. Knowing which category you’re in — before you spend money or risk damage — is the whole point of this sequence.


Stay in the loop
Get the latest maritimematterstoday updates delivered to your inbox.