Boat Bilge Pump Not Working — How to Fix It
Boat bilge pump troubleshooting has gotten complicated with all the conflicting advice flying around. As someone who once spent a sweaty July afternoon watching water creep around my battery box while my “automatic” bilge pump did absolutely nothing, I learned everything there is to know about tracking down these failures. Today, I will share it all with you.
Here’s the thing most repair guides get wrong — they dump a list of five possible causes on you and walk away. The diagnostic sequence matters more than the symptom list. Work through this in order of frequency and you’ll probably find your answer by step two.
Why Bilge Pumps Fail — The Short List
But what is a bilge pump failure, really? In essence, it’s one of four things going wrong. But it’s much more than that — it’s usually the simplest thing, not the scariest one.
Stuck or corroded float switches cause roughly half of all failures. Salt spray, sediment, and corrosion freeze the float arm in place. Dead weight. Doing nothing.
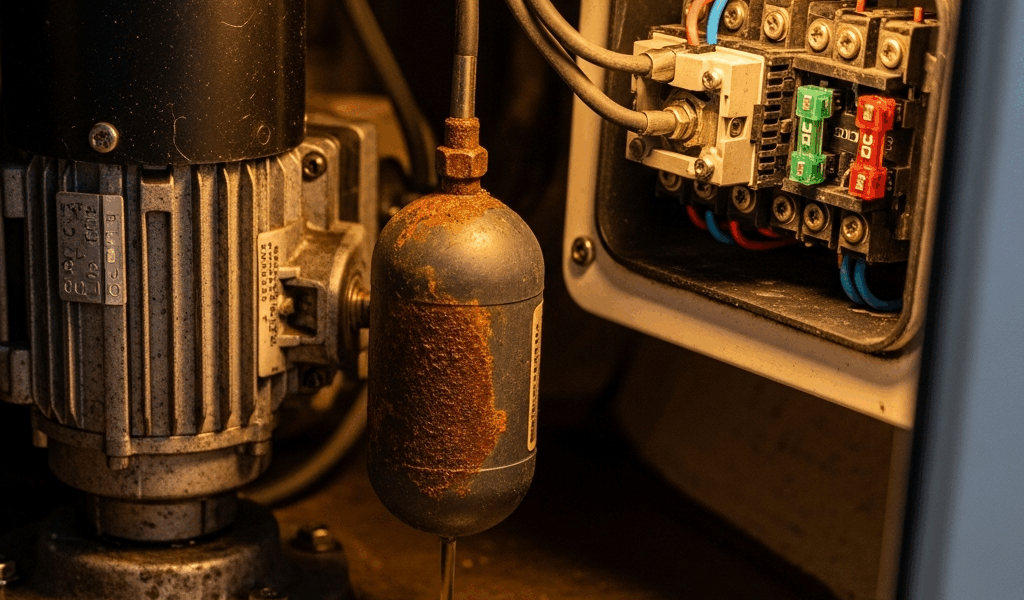
Blown fuses and tripped breakers come next. Most bilge circuits pull somewhere between 5A and 15A depending on pump size. One blown fuse and the whole circuit goes dark — even if the pump motor itself is perfectly healthy.
Corroded or loose wiring terminals rank third. Saltwater boats suffer especially hard here. Green and white oxidation creeps across connections and kills voltage before it ever reaches the pump.
A genuinely dead pump motor is last. When you’ve ruled out everything else and direct 12V still gets no response, the motor is gone and needs swapping out.
Step 1 — Test the Float Switch First
Probably should have opened with this section, honestly. Float switch failure is the most common culprit and the fastest to diagnose — we’re talking 30 seconds to confirm or rule it out entirely.
Locate your float switch inside the bilge sump. It’s usually a plastic cage — sometimes with a pivoting arm, sometimes with a floating ball — mounted so it rises with water. Some sit horizontal, some hang vertical. Doesn’t matter. The mechanism needs to move freely.
Grab two jumper wires. Disconnect the float switch completely from the circuit. You’re bypassing it. Run one jumper directly from your positive 12V source — battery terminal or panel — straight to the pump’s positive wire. Run the second jumper from the pump’s negative terminal back to your boat’s ground bus.
Turn on power.
Pump runs? Even weakly? Your float switch is the problem — not the pump. That’s what makes this test endearing to us DIY boat owners. Simple, fast, no guesswork.
Now pull apart the float cage and physically inspect it. Run your finger along the pivot point. Corroded switches feel rough or crusty — sometimes almost sandy. Some float arms waterlog over time and sink, holding themselves down even when water levels rise. A waterlogged or badly corroded switch won’t recover. Replace it.
Mildly stuck switches, though? Those often just need cleaning. White vinegar and a soft-bristled brush scrub corrosion off the pivot arm and cage wall pretty well. Rinse with fresh water after. Cycle the arm up and down by hand — do it 20 times minimum to break loose any packed sediment. Let everything dry before reinstalling.
Replacement float switches run $15 to $35. Rule and Attwood both make standard models — the Rule 40A fits most mid-size boats and costs around $18 at West Marine. Installation takes maybe 20 minutes with a screwdriver and wire strippers. Don’t make my mistake of assuming the old one is “probably fine.”
Step 2 — Check the Fuse and Breaker Panel
If your pump ran on direct 12V power in Step 1, skip this entirely — your problem is the switch, not the circuit. If the pump stayed silent even on direct power, move here next.
Find your electrical panel. The bilge pump breaker should be labeled. If it isn’t — and on older boats, it often isn’t — trace the pump’s power cable back toward the panel by hand until you find it.
Pull the fuse. Hold it up to sunlight and look through the clear plastic body at the wire element inside. An intact fuse element sits bright and unbroken. A blown fuse shows a snapped wire or a blackened smear where the element melted through. Hard to miss once you know what you’re looking for.
No fuse yet? Use a 12V test light. One probe on each end of the fuse terminals. Good fuse — light comes on. Blown fuse — nothing.
Here’s the part most guides skip: if the fuse blew, don’t just replace it and call it done. A blown fuse is a symptom. Something caused it.
Replace it with an identically rated fuse — check your manual, but 5A to 15A covers most production boats. Run the pump. If it holds and the bilge stays dry, the original fuse may have simply aged out. That happens. Fuses aren’t immortal.
If the replacement blows within a week — or immediately — you’ve got a short circuit or an overloaded motor somewhere in the circuit. Corroded wires shorting to the hull, a pump drawing excessive current, or loose terminals generating resistance and heat. All of those show up in the wiring inspection below.
Step 3 — Trace the Wiring for Corrosion or Loose Terminals
This is where most DIYers lose patience. Wiring inspection sounds tedious because it genuinely is. But a five-minute visual pass catches 80 percent of corrosion problems without any tools at all.
Follow the power cable from your battery or panel — through the float switch — down to the pump. Look for green, white, or blue-gray oxidation on any terminal end or wire barrel. Corroded connections feel rough under your fingernail and look almost fuzzy up close.
Loosen each terminal connector and wiggle it. A clean, tight terminal holds firmly. A corroded one often feels gritty or comes free too easily. Scrub corroded posts and terminal barrels with a small wire brush — the kind that costs $3 at any hardware store — reinstall, and tighten down properly.
For a voltage drop test, set your multimeter to DC volts. One probe on the positive battery terminal. Other probe on the positive terminal at the pump — while the pump is running. You should read 12V or close. Say, 11.8V. Anything above 11.5V is acceptable.
Read below 11V while the pump runs? Resistance somewhere in your wiring is stealing voltage — almost always loose or corroded connections. Tighten everything and retest. Voltage still drops? Replace the corroded cable sections entirely.
I’m apparently sensitive about this, and marine-grade heat-shrink connectors work for me while standard automotive butt connectors never last more than a season in a bilge environment. They cost maybe $1 to $2 more per connector. Worth every penny. Saltwater destroys cheap connectors faster than you’d believe.
When to Replace the Pump Entirely
So. You bypassed the float switch and the pump didn’t run. Fuse is good. Wiring shows full 12V at the pump terminals. Still nothing — or it groans weakly and dies.
The motor is dead. Bearings wear out. Internal windings short. It happens to every pump eventually.
Replacement pumps are rated in gallons per hour. A typical 20-foot boat needs 500 to 800 GPH. Step up to a 30-footer and you’re looking at 800 to 1200 GPH. Check the rating stamped on your current pump housing — usually on a small label near the outlet port.
Rule, Attwood, and Seaflo are the mid-range options most boat owners reach for. The Rule 1100 runs around $55 and moves 1100 GPH. Attwood’s Sahara series hits similar numbers at similar prices. Seaflo tends to run $5 to $10 cheaper and performs comparably for most freshwater and light saltwater use.
One last thing before you buy — check whether your existing circuit is wired for automatic or manual operation. Automatic pumps trigger when the float rises. Manual pumps wait for a switch. Drop an automatic replacement into a manual-only circuit and it won’t self-activate. Read the wiring diagram on the replacement pump before you order anything. That’s what makes this step trip people up.
So, without further ado — start with the float switch. Move to the fuse. Inspect the wiring. Only then pull the pump. This sequence gets 90 percent of boats back to a dry bilge in an hour or less, and you probably won’t need Step 4.


Stay in the loop
Get the latest maritimematterstoday updates delivered to your inbox.